Studio Upgrade

I’ve always had the support and love of my parents and more so in my work whenever I needed help they would be there. It’s important to always acknowledge the support you’ve received, no matter the destination– I will aways remember and value, those who lifted me up.

My mom and Dad are those who have stood by me in the good and bad. Today when I post about upgrading my studio, I cannot do so without acknowledging their hand in so many of my blessings. Even after mom passed away, Dad is ever eager to give support, tips and feedback about the tweaks that improve my work. I could not what I do without them.

My husband, George’s input came much later on in life — he too has been a great encouragement. It is because of his vision of me as an artist and creator that I even dared to own an apple pencil and an iPad. That vision he had, has set me on a path that I never knew was possible. Today I’ve been able to publish books, create worksheets, and create graphics and brushes and do so much in my life because my husband had thought that I may enjoy a resource And that thought has changed my life.

See, you can own the best softwares the best computers, the best phones but knowing what to do with what you have is really the key. Many creators do the most brilliant work using the most basic equipment.

Over the years, I would hire mics and camera and lights for shoots because it was either too expensive to own or else we didn’t have the space.

After mom died, I suddenly got this need to do more with my life. I think it was the idea that life is short. Many people invest in children (and that’s a good thing) and the man’s work because he would be the core bread winner. But I’m blessed to have those who support me even thought I’m not earning as much as many would think I would.

Slow and steady wins the race was a phrase that I would always remember as a child — I don’t know if that can be applied to my life but for now I’m happy that I’m working and busy and creating.

For a creator, creating is oxygen. And even if you’re “just a house wife” (as I’m often made to feel from many people) take creation out of my life I’m a carcass.

I’m so grateful for the upgrades that keep happening in my career. First it was a camera, then a light, then a mic. I know the journey I have had to set up my studio. The kind gifts I have received from people like Thomas, or the birthdays and Christmas’s which I used the gifts to invest in my studio.

Youtube has been a great source of knowledge for me. Unlike my Dad, mom and brother who all graduated from the XIC (Xavier’s Institute of Communication) I was “unpad-gavaar” (uneducated) when it came to the media.

As a teenager, I learned photography and camera because I wanted to develop photographs in the Woodstock School dark room (I was fascinated by the chemical developing) in Hostel. I got into video because I wanted to learn how to edit in the edit bay at the Media centre.

Eventually my skills were honed when no cameraman wanted to shoot late night parties which was my show. Because of that, I had to learn the PD150 camera and learn how to shoot myself in the night.

My editing skills took a professional turn when the producers at Headlines Today office at the Delhi office told my manager that I didn’t know how to speak English (Turns out they were just being lazy and didn’t want to edit my stories). She (Rukmini) told me the only way to counter that was to edit my own content, and she was right. Suddenly once my final edited pieces started streaming from the Bombay office, my English was no longer an issue.

I remember in NDTV I needed to learn Avid to edit stories, and my for my first edit that went on air, Pranay Roy (we’ve grown up admiring and watching him) walked up to me and complimented me about my editing skills.

Editing my own content in my media work empowered me to create creative content that looked different from the other content. That gave me advantages of creative jobs and opportunities.

Once I set up my own studio from the computer I edited on, to the software I was using to the tables, backdrops, set design elements all of this was done with God’s help, my parents (and more recently Dad) and my husband George.

I hope this video helps you navigate and discover what you may want to add into your studio. And I hope my written words encourage you to never give up on your dreams and be open to get help from those who love you because that really is what has enhanced the quality of my work.

I do have some links which may help you find some of the things I’ve bought to upgrade my studio, these are affiliate links so at no cost to you I may earn a commission

Equipment used:

Shot with Iphone13

Overhead Sony Zv1

Mic 1 and Mic 2

Light kit : Lantern, Lantern Skirt, Main Light , Left and Right Table Lights,

Ikea Table, Ipad Pro 12.9, Ipad 10.2

Creating Video Content from home

We’re all at home, wondering what to do with our time, some of us want to engage with our businesses in video formats, some of us are being asked to create video content. A friend of mine got a notice from his college that he had to shoot E-content to their students. They have to shoot video lectures assignments and quizzes. This may be new territory for many since most people buy a phone and that’s it. They never bother investing phone tripods, or phone friendly mic let alone know where to shoot content (hint hint: window light). So I’m here to help. 

These links are affiliate links, I may earn a percentage (at no cost to you) this goes to support my writing work, video and content creation online

Now given how advance most mobile phones have become, recording with your phone is perfectly ok. The tricky part is stabilising, audio and lighting which incase you need I’ll add a list of Lights you could buy.  

WHAT YOU NEED  

More than technical knowledge, to create an audible and visually appealing video to get people to engage with your content, you need to start with a few essential items. Please note: These are all my personal recommendations from the products I use on a daily basis creating my content. Please feel free to use this as a guide so you can make an informed decision. 

Stabilising Options: Keeping the camera still is very important when you’re shooting video. Even a small jerk can spoil your content and in post production you cannot change too much.  

LIGHT TRIPODS FOR MOBILE PHONES 

1. KMNIC 3110 Portable and Foldable Tripod with Mobile Clip Holder Bracket with Mini Lavalier Lapel Microphone 3.5mm  (with a free mic): ₹ 449.00

2. Mini Tripod Table Top Ispite® Portable Mini Tabletop Fold-able Tripod Stand Support Ball head Clip for Stand Mount, Selfie Support Tripod Tripod Kit for Mobile Phones and DSLR & Digital Cameras (Black, Supports Up to 500 g) ₹ 399.00 +  76.00 Delivery charge 

3. Gorilla Pods : Slovic Gorilla Tripod 10 Inch for Mobiles with Mobile Holder & Bluetooth Remote (Black-White) ₹ 499.00

4. Electomania® Universal Stabilizer C-Shape Bracket Video Handheld Grip for DSLR DV Camera   ₹ 539.00

5. EYUVAA LABEL 10″ LED Ring Light with 60″ Tripod Stand Tabletop Stand & Phone Holder for Making up & Tiktok YouTube Videos Photography ₹ 1,999.00

BRACKETS: Brackets are what hold your phone and connect it to the tripod. There are simple brackets and brackets which help you keep audio and light in the same place. I I prefer the all rounder brackets because audio and light is the next most important elements in video creation. 1. THIS IS WHAT I USE ALMOST EVERYDAY: NEOHOOK Video Camera Cage Stabilizer Film Making Rig for All Smart Phones Video Rig Mobile Phone Holder Hand Grip Bracket Holder Stabilizer – Black  Price: ₹ 999.00 I use it to record my videos, I even place it in a top angle position with my tripod and shoot food videos. I use this Rig for putting on the table when i’m podcasting as well. What’s nice about this bracket is that it goes on a Tripod and gives you access to audio and led light in the same place. 

Shahn Camera Stand Clip Bracket Holder Tripod Monopod Mount Adapter for Mobile Phone (Mobile & Tablet Holder)₹ 299.00

Simple Bracket without Audio or LED: HUMBLE Universal Monopod Holder Clip for Mobile Camera Holder and Tripod Mount Holder- Black ₹ 149.00

YANTRALAY SCHOOL OF GADGETS L Shape Hot Shoes Tripod Mount Bracket Holder for Flash Light Camera Mini DV Camcorder Price: ₹ 605.00

Audio: Is very important, although there are many who don’t think this is necessary. The quality of your sound is important because it gives the audience a stress free mode to get your message clearly. They aren’t distracted by the ambience sound of your fan or the pressure cooker. Also getting a lapel mic with a long wire is wise because it gives you the freedom to move around. 

This is the mic that I use, It took me a little time to buy it because it is an investment, but I cannot part with it now. 1. Rode VideoMicro Compact On-Camera Microphone with Rycote Lyre Shock Mount, Black Price: ₹ 5,099.00

2. FreshDcart Mini Singing and Recording Mic Lavalier Lapel Microphone with Long Cable for Recording Singing Youtube on Smartphones (Black) Price: ₹ 249.00

3. If you’re doing your recording at home and no where else and using your computer to record then Maono AU-A04 Condenser Microphone Kit (Black) is ideal ₹ 3,499.00

4. And for a more expensive Audio set up Audio-Technica AT2050 Multi-pattern Condenser Microphone ₹ 20,414.00 A very generous donor donated this mic to my studio and this is use for high end professional recordings. 

5. I haven’t used this but have heard very good things about the Zoom H1n Handy Recorder (Black) ₹ 6,790.00 But you need to have editing skills for this because you will need to sync the audio recorder files to your audio (which is easy for some, but not so easy for most people). 

LIghting: I hardly use LED lights on a daily basis. The sun and the time we shoot is always a better and more natural way to shoot. The better option is to find a window light, make sure you’re facing it and shoot. The camera (especially the phone) captures a more qualitative light with window light. But incase you live in a low light situation or you need to shoot in a dark place, I would say point the light to the ceiling so the light is more diffused (and not harsh) on your face. Test your look and composition in your camera before shooting. Also I would NEVER suggest anything except LED lights now. They are cooler (than the expensive bulb lights). Professional lights are hardly used even now — so invest in LED’s that give you an option of turning white to golden.

Here’s a list LED LIGHTS

1. Osaka Bi-Color Dimmable LED Video Light OS-LED-308 Pocket LED Slim for All DSLR Video Cameras YouTube tiktok Photography Video Shooting with F750 Battery 8000 mAh & Ultra Fast Charger ₹ 2,600.00

2. This light clips into your mobile (its very basic) but it lights up the face very well I had two and both were stolen (they are THAT good!) JSTBUY LABEL JBY-SR36L Selfie Ring Light with 36 LED Bulbs, Flash Lamp Clip Ring Lights Fill-in Lighting Portable for Phone/Tablet/iPad/Laptop Camera (White)  ₹ 395.00

3. Yongnuo_ YN300 Air Pro Led Video Light Price: 2,880.00

4. Ring Lights used to be very expensive, now they are much cheaper. SHYLOC 18 Inches Big LED Ring Light for Photo and Video with Tripod Stand Compatible with Camera and Smartphones Price: ₹ 2,199.00

5. Osaka Bi-Color Dimmable LED Video Light OS-LED-308 Pocket LED Slim for All DSLR Video Cameras YouTube Video tiktok Photography Shooting Without Battery Charger Price: ₹ 1,900.00

With this information and the hardware in place, you are now ready to shoot your content. I have a course for professional content creators looking not just at the technical side of shooting but also the ideating side, scripting, storyboarding, video editing, music and uploading formats. 

And I have a course for kids and level one filmmakers who want to learn the basics of Video Editing. email me at sangeetaangelakumar@gmail.com to enrol. I’m giving a special 50% discount right now (till April 30th 2020). So this is the perfect time to make the most of this resource. 

Feel free to email me and ask me any questions about the course. I’ll be happy to address them, either directly or through a Youtube extended video series on Creating Video Content from home. 

Editing APPS for the Mobile: 

Android: FilmoraGo *best and Adobe Premier Clip 

Mac: iMovie, Video Leap (my go to app)

PC: Window Movie Maker, Adobe Premier Pro

Mac: Final Cut Pro, iMovie   

Evangeline Aaron Wedding

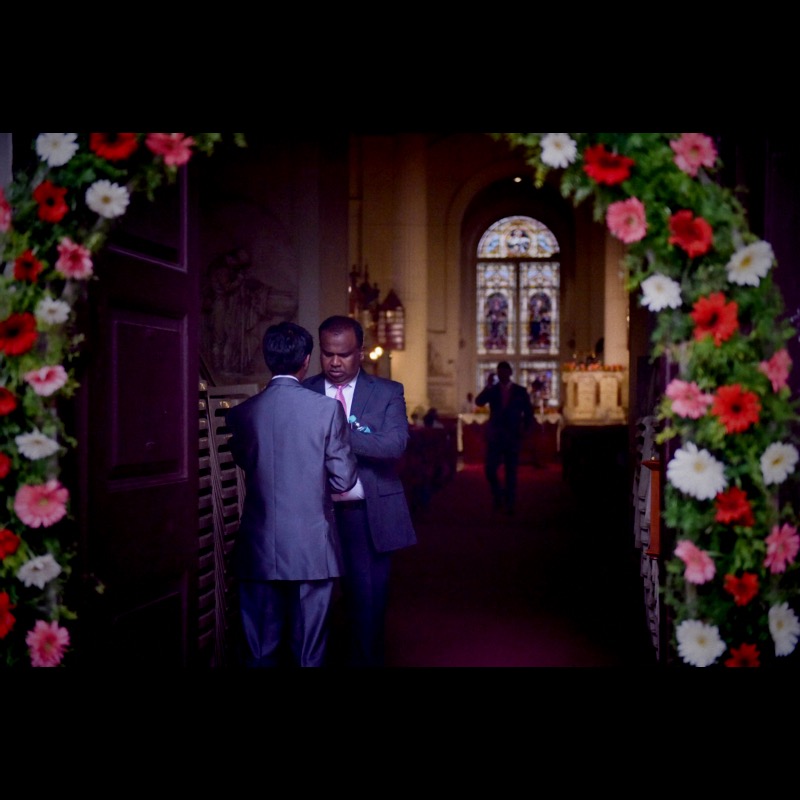
From the beautiful Bride getting ready to her photoshoot with her bridesmaids. As the groom and his bride reach the church guest arrive to witness a union for life. Followed by a fun Photo Booth with all the guests! Here’s Evangeline and Aaron’s Wedding at Chennai.

Camera used
Sangeeta on the Nikon D810
Lens: Nikkor 24-70mm F/2.8G
George on the Sony

Music Composed by: Nigel Ajay Kumar (follow him/subscribe) on https://www.youtube.com/nigelajaykumar

IMG_2558

IMG_2560IMG_2561

Video Editing for Kids: Online Course

Teach your Kids the Basics of Video Editing, which is now available Online.  Equip your kids with the skills to excel in school projects or to develop in their hobbies. Media has become a way of life and having editing skills can come in handy in all walks of life.

This course is especially designed as a good starting point for kids to fuel their passion.

Enrollment Procedure 

1. Course Registration with your personal details

2. Payment

Amount: ₹ 5000/-

Mode: Online Transfer (through NEFT/IMPS)

Name: Sangeeta Angela Kumar

A/C No: 000701620384

Bank: ICICI Bank

Branch: 9A, Phelps Building, CP, New Delhi

IFCS Code: ICIC0000007

3. Course Material Couriered to your address

In this course

Day 1: We give you an inside look at Video Creation with a Check list of Equipment and Shots needed. A brief look at Video Editing History.

Activity: Making a Storyboard.

Day 2: Understanding different Video Editing technologies.

Mobile Photography and Editing, PC Editing and Mac Editing.

Looking at the steps of Editing with a VIDEO example of breaking Video Editing from start to finish and a look at Understanding Glossary and Terminology.

Activity: Shoot a film and Import onto the PC or Mac or Phone (depending on what software you’re using)

Day 3: Apply what you have learnt in class and do a practical edit of the movie shot during class.

From

1.Organising Footage

2. Importing

3. Adding Music

4. Cutting to Music

5. Reedit Draft and Tighten the Edit.

Add Titles

Activity: Submit the Film via Dropbox/Youtube and Email Submission to sang.ladyphotographer@gmail.com

Incase you’re interested in enrolling please call or what’s app

9867552791 or email sang.ladyphotographer@gmail.com

Camera used
Sangeeta on the Nikon D810
Lens: Nikkor 24-70mm F/2.8G
Camera Tripod: Manfrotto MKO55XPRO3-3W

Discovering Multi Language Script on FCPx | Editing the Film on Bhutan Day 1

It’s Day 1of editing and the footage is overwhelming. We had so many camera angles from phones, to Dslr. But assembling a bit multi angle shoot is not even half the battle.

The fun of this was titling.

Bhutan is the country

Bhutanese are the people

The Language is Dzongkha

And the name of Bhutan is actually NOT B-h-u-t-a-n in Dzongkha it’s  འབྲུག་ཡུལ་ Druk-Yul (Look up  Druk  for more)

འབྲུག་རྒྱལ་ཁབ་ Druk Gyal Khap for KINGDOM OF BHUTAN 

This detail many people may or may not know, after visiting the country and having so many friends from there, it was interesting knowing this.

Then came the titling part. I used Over to cut and past the  འབྲུག་ཡུལ  Druk-Yul or འབྲུག་རྒྱལ་ཁབ་ Druk Gyal Khap But I got ambitious. I didn’t want a static png file (which in retrospect would have been easier) to create the titling I wanted the titles to have a typewriter effect. 

So simple enough cup and paste the titles? Nope… So being an Indian and a resident of a country which has many languages I assumed that vernacular and multi languages would just pop up on Fcpx. But it didn’t and this is how it looked.

Screen Shot 2018-05-09 at 5.44.26 PM

So again I know this, as a person who knows Aa Ki Matra and all, that this was not write. So began my journey figuring that out.

I tried all kinds of fonts on FCP but nothing worked.

So I head to Google :

in my researched I found some threads that helped

https://discussions.apple.com/thread/3998205

Some interesting things I learnt, mostly that that even though the many in the world may not recognise Tibet as a country but Apple had installed fonts for their script (wow) https://collab.its.virginia.edu/wiki/tibetan-script/Tibetan%20Fonts.html But despite how politically correct I felt Apple was. I still couldn’t get it to read.

Finally I googled “dzongkha fonts on fcp” wondering if this would even be a search available and I found The National Library of Bhutan http://www.library.gov.bt/IT/fonts.html where I got more than just fonts.

Screen Shot 2018-05-09 at 5.52.00 PM

So I downloaded the Font: Jomolhari-alpha3c-0605331 and installed it on my computer.

Screen Shot 2018-05-09 at 5.35.21 PM

Now the test is whether it opens on FCP

Screen Shot 2018-05-09 at 5.54.30 PM.png

It’s better but …. one part looks wrong.

Will find the solution and be back have tried “Enabling Dzongkha support on MAC” and got Using Dzongkha on Apple Macintosh

I downloaded  Jomolhari-alpha3c-0605331 is a super font to download for dzongkha fonts on fcp.

I restarted FCP was looking for the font lists and accidentally stumbled on this!

Screen Shot 2018-05-09 at 6.04.41 PM

So Turns out

SOLUTION: Font ” SignPainter- House Script ” will allow you to have success

Edited on (Affiliate Links) iMac

Video Editing For Kids Course

Teaching has always been my passion. Right there with Media teach always went hand in hand . Whether it was teaching the BMM students at Wilson College as a guest lecturer, Sunday School for 10 years at Taylor Memorial Church or my stint in Bhopal as an English CIE Teacher to 6th Graders. So when I get a chance to bring my two loves together, Teaching & Video Editing happiness and joy is the only reaction.

Day 1

I haven’t taught home school kids, the experience was interesting and so different. Stay tuned for Day 2 next week.

To enrol in classes around Mumbai
email: sang.ladyphotographer@gmail.com

For more updates
Instagram: https://www.instagram.com/sangeetaangelakumar/
Facebook: https://www.facebook.com/sangladyphotographer/
My photographer blog: https://sangladyphotographer.wordpress.com
My personal blog: https://lifeofsak.wordpress.com

Camera used (affiliate links)
Sangeeta on the Nikon D810 , Lens: Nikkor 24-70mm F/2.8G , Video Editing: iMac and Camera Tripod: Manfrotto MKO55XPRO3-3W


My Camera Kit

Most people would not consider mobile videography worth any professional standard. But a few years ago I shot a complete wedding with my phone using slow motion and all and it was amazing. The bride and groom loved it and I wasn’t doing it for a professional fee, they were friends.

So since then I’ve valued mobile photography. Here’s a look at what’s in My Camera kit: For quick 4k Mobile Photography/Videos.

I’ve listed Six Must Haves in your bag but you may know more.

Here’s an inside look at my kit. It’s a small Japanese wrist bag, which fits my

That’s my kit. Let me know if you think I should add more or remove some.

Camera used (affiliate links)
Sangeeta on the Nikon D810 , Lens: Nikkor 24-70mm F/2.8G , Video Editing: iMac and Camera Tripod: Manfrotto MKO55XPRO3-3W

Meetha Paan

Many people don’t know what goes into their Meetha Paan here’s an inside look literally!


Hipstamatic vs FilmBorn

Taking a book at Hipstamatic vs FilmBorn

The Products I use: (Affliated Links)